您现在的位置是:主页 > news > 广州网站制作品牌/国际国内新闻最新消息今天
广州网站制作品牌/国际国内新闻最新消息今天
![]() admin2025/6/28 15:11:02【news】
admin2025/6/28 15:11:02【news】
简介广州网站制作品牌,国际国内新闻最新消息今天,徐州中小企业网站制作,网站改版中文章目录1开发环境的搭建2 编译过程GCC编译器g重要编译参数3IDE- VSCode3.1案例helloworld3.2案例交换swap4CMake4.1Cross-platform development4.2语法特性介绍4.3重要指令和CMake常用变量4.3.1重要指令4.3.2CMake 常用变量4.4 CMake编译工程4.4.1 编译流程4.4.2两种构建方式4…
文章目录
- 1开发环境的搭建
- 2 编译过程GCC编译器
- g++重要编译参数
- 3IDE- VSCode
- 3.1案例helloworld
- 3.2案例交换swap
- 4CMake
- 4.1Cross-platform development
- 4.2语法特性介绍
- 4.3重要指令和CMake常用变量
- 4.3.1重要指令
- 4.3.2CMake 常用变量
- 4.4 CMake编译工程
- 4.4.1 编译流程
- 4.4.2两种构建方式
- 4.5Cmake实战
- 4.5.1 helloworld
- 4.5.2 swap
- 5使用VSCode进行完整项目开发
- 5.1合理设置项目目录
- 5.2编写项目源代码
- g++编译
- CMakeList编写
- 配置json文件并调试项目
- task.json
原地址
https://www.bilibili.com/video/BV1fy4y1b7TC?p=12
1开发环境的搭建
安装gcc和gdb
sudo apt  update
# 通过以下命令安装编译器和调试器
sudo apt install build-essential gdb
成功后测试
# 以下命令确认每个软件是否安装成功
# 如果成功,则显示版本号
gcc --version
g++ --version
gdb --version

安装CMAKE
sudo apt-get install cmake
2 编译过程GCC编译器
- GCC 编译器支持编译 Go、Objective-C,Objective-C ++,Fortran,Ada,D 和 BRIG(HSAIL)
等程序; - Linux 开发C/C++ 一定要熟悉 GCC
- VSCode是通过调用GCC编译器来实现C/C++的编译工作的;
实际使用中:
使用 gcc 指令编译 C 代码
使用 g++指令编译 C++ 代码

g++重要编译参数
1 -g 编译带调试信息的可执行文件
 -g 编译带调试信息的可执行文件# -g 选项告诉 GCC 产生能被 GNU 调试器GDB使用的调试信息,以调试程序。
# 产生带调试信息的可执行文件test
g++ -g test.cpp


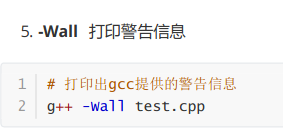
6 -w 关闭警告信息
# 关闭所有警告信息
g++ -w test.cpp

3IDE- VSCode
软件使用要用以下插件
C/C++
CMake
Cmake tools

3.1案例helloworld
#include <iostream>
using namespace std;
int main(int argc, char **argv)
{cout<< "hello world" <<endl;return 0;
}


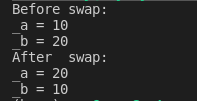
3.2案例交换swap


g++ 5.3.2-practise/main.cpp  5.3.2-practise/src/swap.cpp  -I 5.3.2-practise/include   -o 5.3.2-practise/main
./5.3.2-practise/main
4CMake
CMake是一个跨平台的安装编译工具,可以用简单的语句来描述所有平台的安装(编译过程)。
CMake可以说已经成为大部分C++开源项目标配
4.1Cross-platform development


4.2语法特性介绍
基本语法格式:指令(参数 1 参数 2…)
参数使用括弧括起
参数之间使用空格或分号分开
指令是大小写无关的,参数和变量是大小写相关的

变量使用${}方式取值,但是在 IF 控制语句中是直接使用变量名
4.3重要指令和CMake常用变量
4.3.1重要指令
cmake_minimum_required - 指定CMake的最小版本要求
语法: cmake_minimum_required(VERSION versionNumber [FATAL_ERROR])
# CMake最小版本要求为2.8.3
cmake_minimum_required(VERSION 2.8.3)

add_compile_options - 添加编译参数
语法:add_compile_options( )
# 添加编译参数 -Wall -std=c++11 -O2
add_compile_options(-Wall -std=c++11 -O2)
add_executable - 生成可执行文件
语法:add_executable(exename source1 source2… sourceN)
# 编译main.cpp生成可执行文件main
add_executable(main main.cpp)

4.3.2CMake 常用变量

CMAKE_BINARY_DIR
PROJECT_BINARY_DIR
_BINARY_DIR
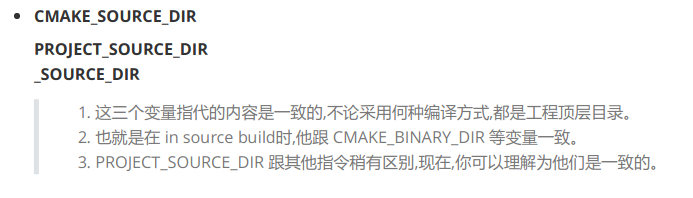
- 这三个变量指代的内容是一致的。
- 如果是 in source build,指的就是工程的顶层目录
- 如果是out-of-source 编译,指的是工程编译发生的目录`
- PROJECT_BINARY_DIR根指令有区别,现在可以认为是一致的
4.4 CMake编译工程
CMake目录结构:项目主目录存在一个CMakeLists.txt文件
两种方式设置编译规则:
- 包含源文件的子文件夹包含CMakeLists.txt文件,主目录的CMakeLists.txt通过add_subdirectory
添加子目录即可; - 包含源文件的子文件夹未包含CMakeLists.txt文件,子目录编译规则体现在主目录的
CMakeLists.txt中;
4.4.1 编译流程
在 linux 平台下使用 CMake 构建C/C++工程的流程如下:
1手动编写 CMakeLists.txt。
2执行命令 cmake PATH 生成 Makefile ( PATH 是顶层CMakeLists.txt 所在的目录 )。
3执行命令 make 进行编译
# important tips
.    # 表示当前目录
./   # 表示当前目录
..   # 表示上级目录
../  # 表示上级目录
4.4.2两种构建方式
内部构建(in-source build):不推荐使用
内部构建会在同级目录下产生一大堆中间文件,这些中间文件并不是我们最终所需要的,和工程源
文件放在一起会显得杂乱无章。
## 内部构建
# 在当前目录下,编译本目录的CMakeLists.txt,生成Makefile和其他文件
cmake .
# 执行make命令,生成target
make
外部构建(out-of-source build):推荐使用
将编译输出文件与源文件放到不同目录中
## 外部构建
# 1. 在当前目录下,创建build文件夹
mkdir build
# 2. 进入到build文件夹
cd build
# 3. 编译上级目录的CMakeLists.txt,生成Makefile和其他文件
cmake ..
# 4. 执行make命令,生成target
make
4.5Cmake实战
4.5.1 helloworld
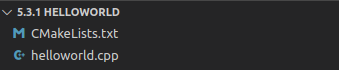
CMakeList.txt
cmake_minimum_required(VERSION 3.0) project(HELLOWORLD)add_executable(helloWorld_cmake helloworld.cpp)
helloworld.cpp
#include <iostream>
using namespace std;int main(int argc, char **argv)
{cout << "Hello World!" << endl;return 0;
}

内部构建,会多出很多无效文件,编译成功,将多与文件删除尝试外部构建
 外部构建,比较干净


4.5.2 swap
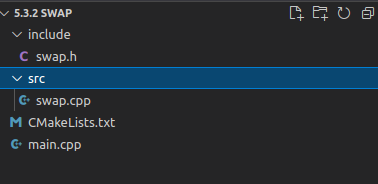
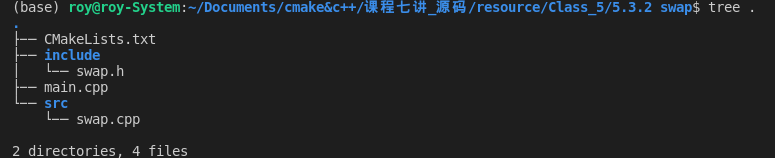
CMakeList.txt
cmake_minimum_required(VERSION 3.0)project(SWAP)include_directories(include)add_executable(main_cmake main.cpp src/swap.cpp)
5使用VSCode进行完整项目开发
5.1合理设置项目目录


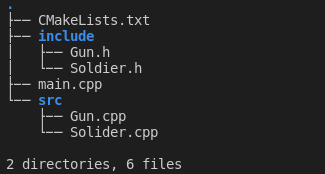
5.2编写项目源代码
Gun.h
#pragma once
#include <string>class Gun
{
public:Gun(std::string type){this->_bullet_count = 0;this->_type = type;}void addBullet(int bullet_num);bool shoot();private:int _bullet_count;std::string _type;};
Solider.h
#pragma once#include <string>
#include "Gun.h"class Solider
{
public:Solider(std::string name);~Solider();void addGun(Gun *ptr_gun);void addBulletToGun(int num);bool fire();private:std::string _name;Gun *_ptr_gun;
};
Gun.cpp
#include "Gun.h"
#include "iostream"
using namespace std;void Gun::addBullet(int bullet_num)
{this->_bullet_count += bullet_num;
}bool Gun::shoot()
{if (this->_bullet_count<=0){cout << "There is no bullet!" << endl;return false;}this->_bullet_count -= 1;cout << "shoot successfully!" << endl;return true;}
Solider.cpp
#include "Soldier.h"Solider::Solider(std::string name)
{this->_name = name;this->_ptr_gun = nullptr;
}void Solider::addGun(Gun *ptr_gun)
{this->_ptr_gun = ptr_gun;
}void Solider::addBulletToGun(int num)
{this->_ptr_gun->addBullet(num);
}bool Solider::fire()
{return(this->_ptr_gun->shoot());
}Solider::~Solider()
{if (this->_ptr_gun==nullptr){return;}delete this->_ptr_gun;this->_ptr_gun = nullptr;}
main.cpp
#include "Gun.h"
#include "Soldier.h"
#include <iostream>void test()
{Solider sanduo("xusanduo");sanduo.addGun(new Gun("AK47"));sanduo.addBulletToGun(20);sanduo.fire();
}int main()
{std::cout << "This is a test string..." << std::endl;std::cout << "This is a test string..." << std::endl;test();return 0;
}
CMakeList.txt
cmake_minimum_required(VERSION 3.0)project(SOLIDERFIRE)set(CMAKE_CXX_FLAGS "${CMAKE_CXX_FLAGS} -Wall")set(CMAKE_BUILD_TYPE Debug)include_directories(${CMAKE_SOURCE_DIR}/include)add_executable(my_cmake_exe main.cpp src/Gun.cpp src/Solider.cpp)
g++编译
g++ main.cpp src/Gun.cpp src/Solider.cpp -Iinclude -o myexe

多加点参数

这时有g++的生成文件,删了myexe
CMakeList编写
CMakeList.txt
cmake_minimum_required(VERSION 3.0)project(SOLIDERFIRE)set(CMAKE_CXX_FLAGS "${CMAKE_CXX_FLAGS} -Wall")
#后面还可以加 -O2 -g等
#set(CMAKE_CXX_FLAGS "${CMAKE_CXX_FLAGS} -Wall -g  -O2")
include_directories(${CMAKE_SOURCE_DIR}/include)add_executable(my_cmake_exe main.cpp src/Gun.cpp src/Solider.cpp)

配置json文件并调试项目
 ${workspaceFolder} 项目的顶层目录
program调式的可执行文件程序绝对路径
{// Use IntelliSense to learn about possible attributes.// Hover to view descriptions of existing attributes.// For more information, visit: https://go.microsoft.com/fwlink/?linkid=830387"version": "0.2.0","configurations": [{"name": "(gdb) 启动","type": "cppdbg","request": "launch","program": "${workspaceFolder}/build/my_cmake_exe","args": [],"stopAtEntry": false,"cwd": "${fileDirname}","environment": [],"externalConsole": false,"MIMode": "gdb","setupCommands": [{"description": "为 gdb 启用整齐打印","text": "-enable-pretty-printing","ignoreFailures": true}]}]
}
重新编译,再加入断点给main程序

按F5进行调试,这里可以给cmakelist加以条build模式是debug,然后再调式,这里Debug是调试如果是Release就是发放版本无法调试
CMakeList.txt
cmake_minimum_required(VERSION 3.0)project(SOLIDERFIRE)set(CMAKE_CXX_FLAGS "${CMAKE_CXX_FLAGS} -Wall")set(CMAKE_BUILD_TYPE Debug)include_directories(${CMAKE_SOURCE_DIR}/include)add_executable(my_cmake_exe main.cpp src/Gun.cpp src/Solider.cpp)
task.json

修改后
launch.json
{// Use IntelliSense to learn about possible attributes.// Hover to view descriptions of existing attributes.// For more information, visit: https://go.microsoft.com/fwlink/?linkid=830387"version": "0.2.0","configurations": [{"name": "(gdb) 启动","type": "cppdbg","request": "launch","program": "${workspaceFolder}/build/my_cmake_exe","args": [],"stopAtEntry": false,"cwd": "${fileDirname}","environment": [],"externalConsole": false,"MIMode": "gdb","setupCommands": [{"description": "为 gdb 启用整齐打印","text": "-enable-pretty-printing","ignoreFailures": true}],"preLaunchTask":"Build",}]
}
task.json
{ "version": "2.0.0","options": {"cwd": "${workspaceFolder}/build"},"tasks": [{"type": "shell","label": "cmake","command": "cmake","args": [".."]},{"label": "make","group": {"kind": "build","isDefault": true},"command": "make","args": []},{"label": "Build","dependsOrder": "sequence", // 按列出的顺序执行任务依赖项"dependsOn":["cmake","make"]}]}
加入断点后不需要重新编译即可使用调试


