您现在的位置是:主页 > news > h5网站开发语言选择/网站推广的方法有哪些?
h5网站开发语言选择/网站推广的方法有哪些?
![]() admin2025/6/2 19:01:08【news】
admin2025/6/2 19:01:08【news】
简介h5网站开发语言选择,网站推广的方法有哪些?,那个网站专门做二手衣服,兰州需要做网站的公司有哪些LZ今天自己搭建了下Spring bootMybatis,比原来的SpringSpringMVCMybatis简单好多。其实只用Spring boot也可以开发,但是对于多表多条件分页查询,Spring boot就有点力不从心了,所以LZ把Mybatis整合进去,不得不说&#x…
LZ今天自己搭建了下Spring boot+Mybatis,比原来的Spring+SpringMVC+Mybatis简单好多。其实只用Spring boot也可以开发,但是对于多表多条件分页查询,Spring boot就有点力不从心了,所以LZ把Mybatis整合进去,不得不说,现在的框架搭建真的是方便。话不多说,进入正题。
一、java web开发环境搭建
二、Spring boot搭建
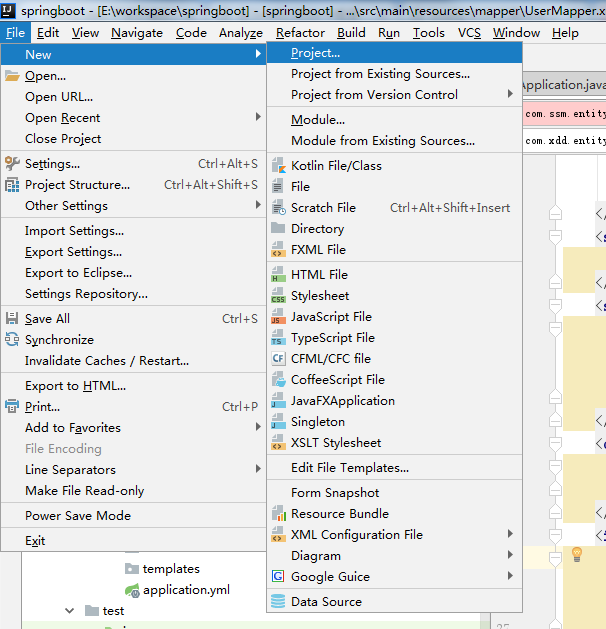
1、Intellij idea菜单栏File->new->project。
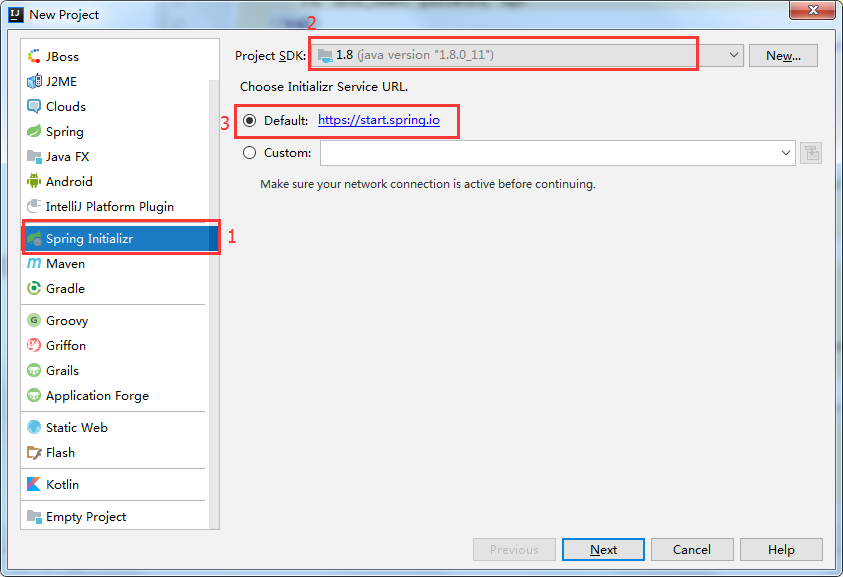
2、选择左侧栏中spring initializr,右侧选择jdk版本,以及默认的Service URL,点击next。
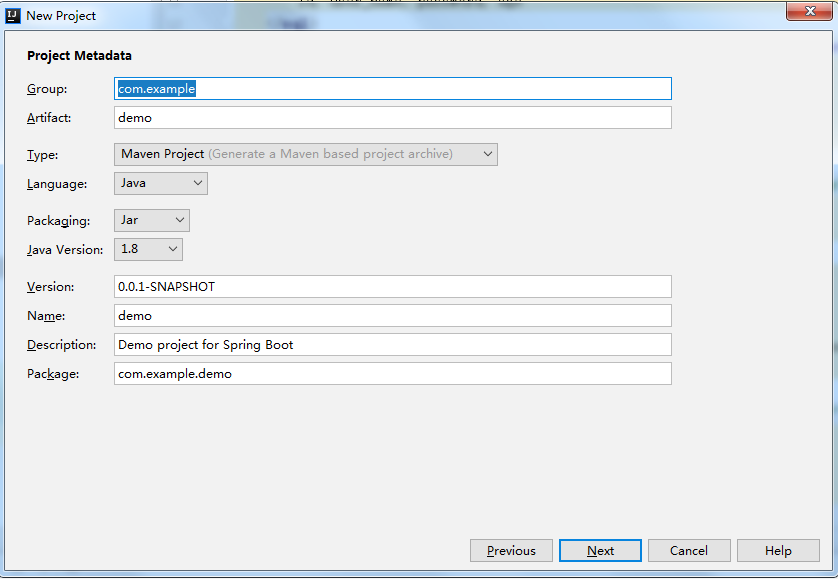
/3、然后填写项目的Group、Artifact等信息,helloworld阶段选默认就可以了,点击next。
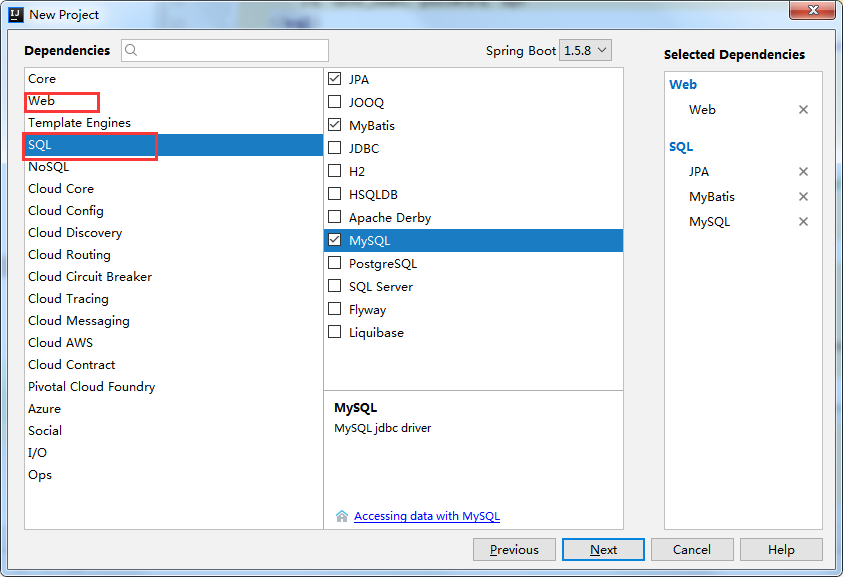
4、左侧点击Web,中间一侧选择Web,然后左侧选择SQL,中间一侧选择JPA、Mybatis、MYSQL(LZ数据库用的是mysql,大家可以选择其他DB),点击next。
5、填写Project name 等信息,然后点击Finish。
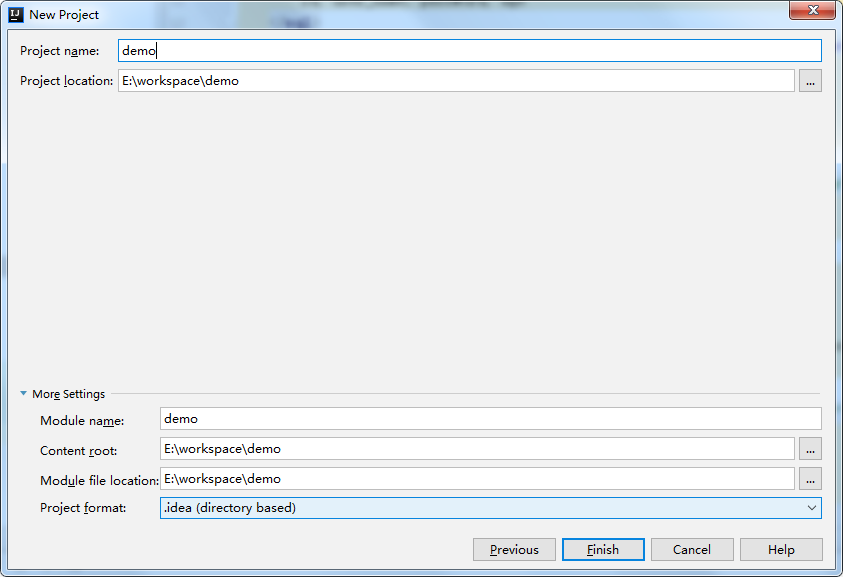
至此,一个maven web项目就创建好了,目录结构如下:
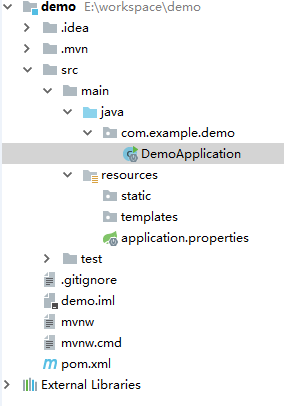
这样,Spring boot就搭建好了,pom.xml里已经有了Spring boot的jar包,包括我们的mysql数据连接的jar包。Spring boot内置了类似tomcat这样的中间件,所以,只要运行DemoApplication中的main方法就可以启动项目了。我们测试一下。
在src/main/java下新建目录com/demo/entity/User。
packagecom.demo.entity;public classUser {privateString name;publicString getName() {returnname;
}public voidsetName(String name) {this.name =name;
}
}
相同目录下新建com/demo/controller/TestBootController。
packagecom.demo.controller;importcom.demo.entity.User;importorg.springframework.boot.autoconfigure.EnableAutoConfiguration;importorg.springframework.web.bind.annotation.RequestMapping;importorg.springframework.web.bind.annotation.RestController;
@RestController
@EnableAutoConfiguration
@RequestMapping("/testboot")public classTestBootController {
@RequestMapping("getuser")publicUser getUser() {
User user= newUser();
user.setName("test");returnuser;
}
}
spring boot启动DemoAplication是需要扫描它下面的Controller等类的,所以将DemoApplication移动到com/demo目录下。还有就是Spring boot启动默认是要加载数据源的,所以我们在src/main/resources下新建application.yml:
#默认使用配置
spring:
profiles:
active: dev
#公共配置与profiles选择无关
mybatis:
typeAliasesPackage: com.xdd.entity
mapperLocations: classpath:mapper/*.xml
---
#开发配置
spring:
profiles: dev
datasource:
url: jdbc:mysql://localhost:3306/test
username: root
password: root
driver-class-name: com.mysql.jdbc.Driver
或者将pom.xml中加载数据源的jar包先注释掉也可以。
/*
org.mybatis.spring.boot
mybatis-spring-boot-starter
1.3.0
*/
最终的目录结构如下,
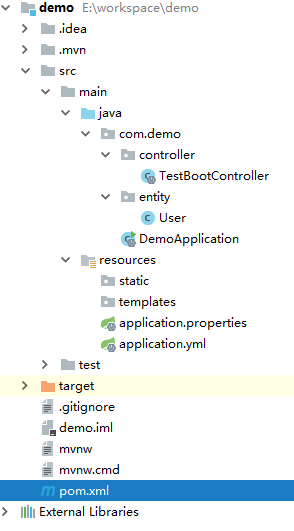
启动DemoApplication的main方法,访问http://localhost:8080/testboot/getuser即可。

三、整合Mybatis
1、集成druid,使用连接池。pom.xml中添加:
com.alibaba
druid
1.1.0
最终的pom.xml文件:
4.0.0
com.arm
demo
0.0.1-SNAPSHOT
jar
demo
Demo project for Spring Boot
org.springframework.boot
spring-boot-starter-parent
1.5.8.RELEASE
UTF-8
UTF-8
1.8
org.springframework.boot
spring-boot-starter-data-jpa
org.mybatis.spring.boot
mybatis-spring-boot-starter
1.3.1
org.springframework.boot
spring-boot-starter-web
mysql
mysql-connector-java
runtime
org.springframework.boot
spring-boot-starter-test
test
com.alibaba
druid
1.1.0
org.springframework.boot
spring-boot-maven-plugin
在application.yml中添加数据源、Mybatis的实体和配置文件位置。
#默认使用配置
spring:
profiles:
active: dev
#公共配置与profiles选择无关 mapperLocations指的路径是src/main/resources
mybatis:
typeAliasesPackage: com.xdd.entity
mapperLocations: classpath:mapper/*.xml
---
#开发配置
spring:
profiles: dev
datasource:
url: jdbc:mysql://localhost:3306/test
username: root
password: root
driver-class-name: com.mysql.jdbc.Driver
# 使用druid数据源
type: com.alibaba.druid.pool.DruidDataSource
就这样就整合完成了!我们测试一下。
importcom.xdd.entity.User;importorg.springframework.stereotype.Component;public interfaceUserDao {intdeleteByPrimaryKey(Integer id);intinsert(User record);intinsertSelective(User record);
User selectByPrimaryKey(Integer id);intupdateByPrimaryKeySelective(User record);intupdateByPrimaryKey(User record);
}
UserMapper.xml
id, user_name, password, age
selectfrom user_t
where id= #{id,jdbcType=INTEGER}
delete from user_t
where id= #{id,jdbcType=INTEGER}
insert into user_t (id, user_name, password,
age)
values (#{id,jdbcType=INTEGER}, #{userName,jdbcType=VARCHAR}, #{password,jdbcType=VARCHAR},
#{age,jdbcType=INTEGER})
insert into user_t
id,
user_name,
password,
age,
#{id,jdbcType=INTEGER},
#{userName,jdbcType=VARCHAR},
#{password,jdbcType=VARCHAR},
#{age,jdbcType=INTEGER},
update user_t
user_name= #{userName,jdbcType=VARCHAR},
password= #{password,jdbcType=VARCHAR},
age= #{age,jdbcType=INTEGER},
where id= #{id,jdbcType=INTEGER}
update user_t
set user_name= #{userName,jdbcType=VARCHAR},
password= #{password,jdbcType=VARCHAR},
age= #{age,jdbcType=INTEGER}
where id= #{id,jdbcType=INTEGER}
public classUser {privateInteger id;privateString userName;privateString password;privateInteger age;publicInteger getId() {returnid;
}public voidsetId(Integer id) {this.id =id;
}publicString getUserName() {returnuserName;
}public voidsetUserName(String userName) {this.userName = userName == null ? null: userName.trim();
}publicString getPassword() {returnpassword;
}public voidsetPassword(String password) {this.password = password == null ? null: password.trim();
}publicInteger getAge() {returnage;
}public voidsetAge(Integer age) {this.age =age;
}
}
最后将DemoApplication.java修改一下,让其扫描dao层接口。
importorg.mybatis.spring.annotation.MapperScan;importorg.springframework.boot.SpringApplication;importorg.springframework.boot.autoconfigure.SpringBootApplication;importorg.springframework.boot.web.support.SpringBootServletInitializer;
@SpringBootApplication
@MapperScan("com.xdd.dao")public class DemoApplication extendsSpringBootServletInitializer{public static voidmain(String[] args) {
SpringApplication.run(DemoApplication.class,args);
}
}
自己添加controller和service
importjava.util.List;importjava.util.Map;public interfaceUserService {public User getUserById(intuserId);booleanaddUser(User record);
}
importorg.springframework.beans.factory.annotation.Autowired;importorg.springframework.stereotype.Service;importjavax.annotation.Resource;importjava.util.List;importjava.util.Map;
@Service("userService")public class UserServiceImpl implementsUserService {
@ResourceprivateUserDao userDao;public User getUserById(intuserId) {returnuserDao.selectByPrimaryKey(userId);
}public booleanaddUser(User record){boolean result = false;try{
userDao.insertSelective(record);
result= true;
}catch(Exception e) {
e.printStackTrace();
}returnresult;
}
}
@Controller
@RequestMapping("/user")public classUserController {
@ResourceprivateUserService userService;
@RequestMapping("/showUser")
@ResponseBodypublicUser toIndex(HttpServletRequest request, Model model){int userId = Integer.parseInt(request.getParameter("id"));
User user= this.userService.getUserById(userId);returnuser;
}
}
浏览器访问http://localhost:8080/user/showUser?id=1

以前找别人的教程的时候总是嫌弃人家写的不详细,真的自己写的时候发现很多细节我也详细介绍不到,比如yml文件使用,比如数据库,看来还是要求别人容易,要求自己难。
--------------------------------------小程序试水--------------------------------------