2019独角兽企业重金招聘Python工程师标准>>> 
社交登录又称作社会化登录(Social Login),是指网站的用户可以使用腾讯QQ、人人网、开心网、新浪微博、搜狐微博、腾讯微博、淘宝、豆瓣、MSN、Google等社会化媒体账号登录该网站。
前言
在之前的Spring Social系列中,我们只是实现了使用服务提供商账号登录到业务系统中,但没有与业务系统中的账号进行关联。本章承接之前社交系列来实现社交账号与业务系统账号的绑定与解绑。
- Spring-Security源码分析三-Spring-Social社交登录过程
- Spring-Security源码分析四-Spring-Social社交登录过程
- Spring-Security源码分析六-Spring-Social社交登录源码解析
UserConnection
create table UserConnection (userId varchar(255) not null,providerId varchar(255) not null,providerUserId varchar(255),......primary key (userId, providerId, providerUserId));
create unique index UserConnectionRank on UserConnection(userId, providerId, rank);
在使用社交登录的时我们创建的UserConnection表,下面我们来简单分析一下
userId业务系统的用户唯一标识(我们使用的是username)providerId用于区分不同的服务提供商(qq,weixin,weibo)providerUserId服务提供商返回的唯一标识(openid)
社交登录注册实现
取消MyConnectionSignUp
在Spring-Security源码分析六-Spring-Social社交登录源码解析中,我们得知,当配置ConnectionSignUp时,Spring Social会根据我们配置的MyConnectionSignUp返回userId,接着执行userDetailsService.loadUserByUserId(userId),实现社交账号登录。当取消掉MyConnectionSignUp则会抛出BadCredentialsException,BadCredentialsException由SocialAuthenticationFilter处理,跳转到默认的/signup注册请求,跳转之前会将当前的社交账号信息保存到session中。
添加自定义注册请求/socialRegister
@Overrideprotected <T> T postProcess(T object) {SocialAuthenticationFilter filter = (SocialAuthenticationFilter) super.postProcess(object);filter.setFilterProcessesUrl(filterProcessesUrl);filter.setSignupUrl("/socialRegister");return (T) filter;}
添加到.permitAll();
.authorizeRequests().antMatchers(SecurityConstants.DEFAULT_UNAUTHENTICATION_URL,......"/socialRegister",//社交账号注册和绑定页面"/user/register",//处理社交注册请求.......permitAll()//以上的请求都不需要认证
配置ProviderSignInUtils
从Session中获取社交账号信息
@Beanpublic ProviderSignInUtils providerSignInUtils(ConnectionFactoryLocator factoryLocator) {return new ProviderSignInUtils(factoryLocator, getUsersConnectionRepository(factoryLocator));}
创建SocialUserInfo
展示当前社交账号信息
@Datapublic class SocialUserInfo {private String providerId;private String providerUserId;private String nickname;private String headImg;}
实现socialRegister和user/register
/socialRegister
@GetMapping(value = "/socialRegister")public ModelAndView socialRegister(HttpServletRequest request, Map<String, Object> map) {SocialUserInfo userInfo = new SocialUserInfo();Connection<?> connection = providerSignInUtils.getConnectionFromSession(new ServletWebRequest(request));userInfo.setProviderId(connection.getKey().getProviderId());//哪一个服务提供商userInfo.setProviderUserId(connection.getKey().getProviderUserId());//openiduserInfo.setNickname(connection.getDisplayName());//名称userInfo.setHeadImg(connection.getImageUrl());//显示头像map.put("user", userInfo);return new ModelAndView("socialRegister", map);}
/user/register
@PostMapping("/user/register")public String register(SysUser user, HttpServletRequest request, HttpServletResponse response) throws IOException {String userId = user.getUsername();//获取用户名SysUser result = sysUserService.findByUsername(userId);//根据用户名查询用户信息if(result==null){//如果为空则注册用户sysUserService.save(user);}//将业务系统的用户与社交用户绑定providerSignInUtils.doPostSignUp(userId, new ServletWebRequest(request));//跳转到indexreturn "redirect:/index";}
修改MyUserDetailsService#loadUserByUserId
@Overridepublic SocialUserDetails loadUserByUserId(String userId) throws UsernameNotFoundException {SysUser user = repository.findByUsername(userId);//根据用户名查找用户return user;}
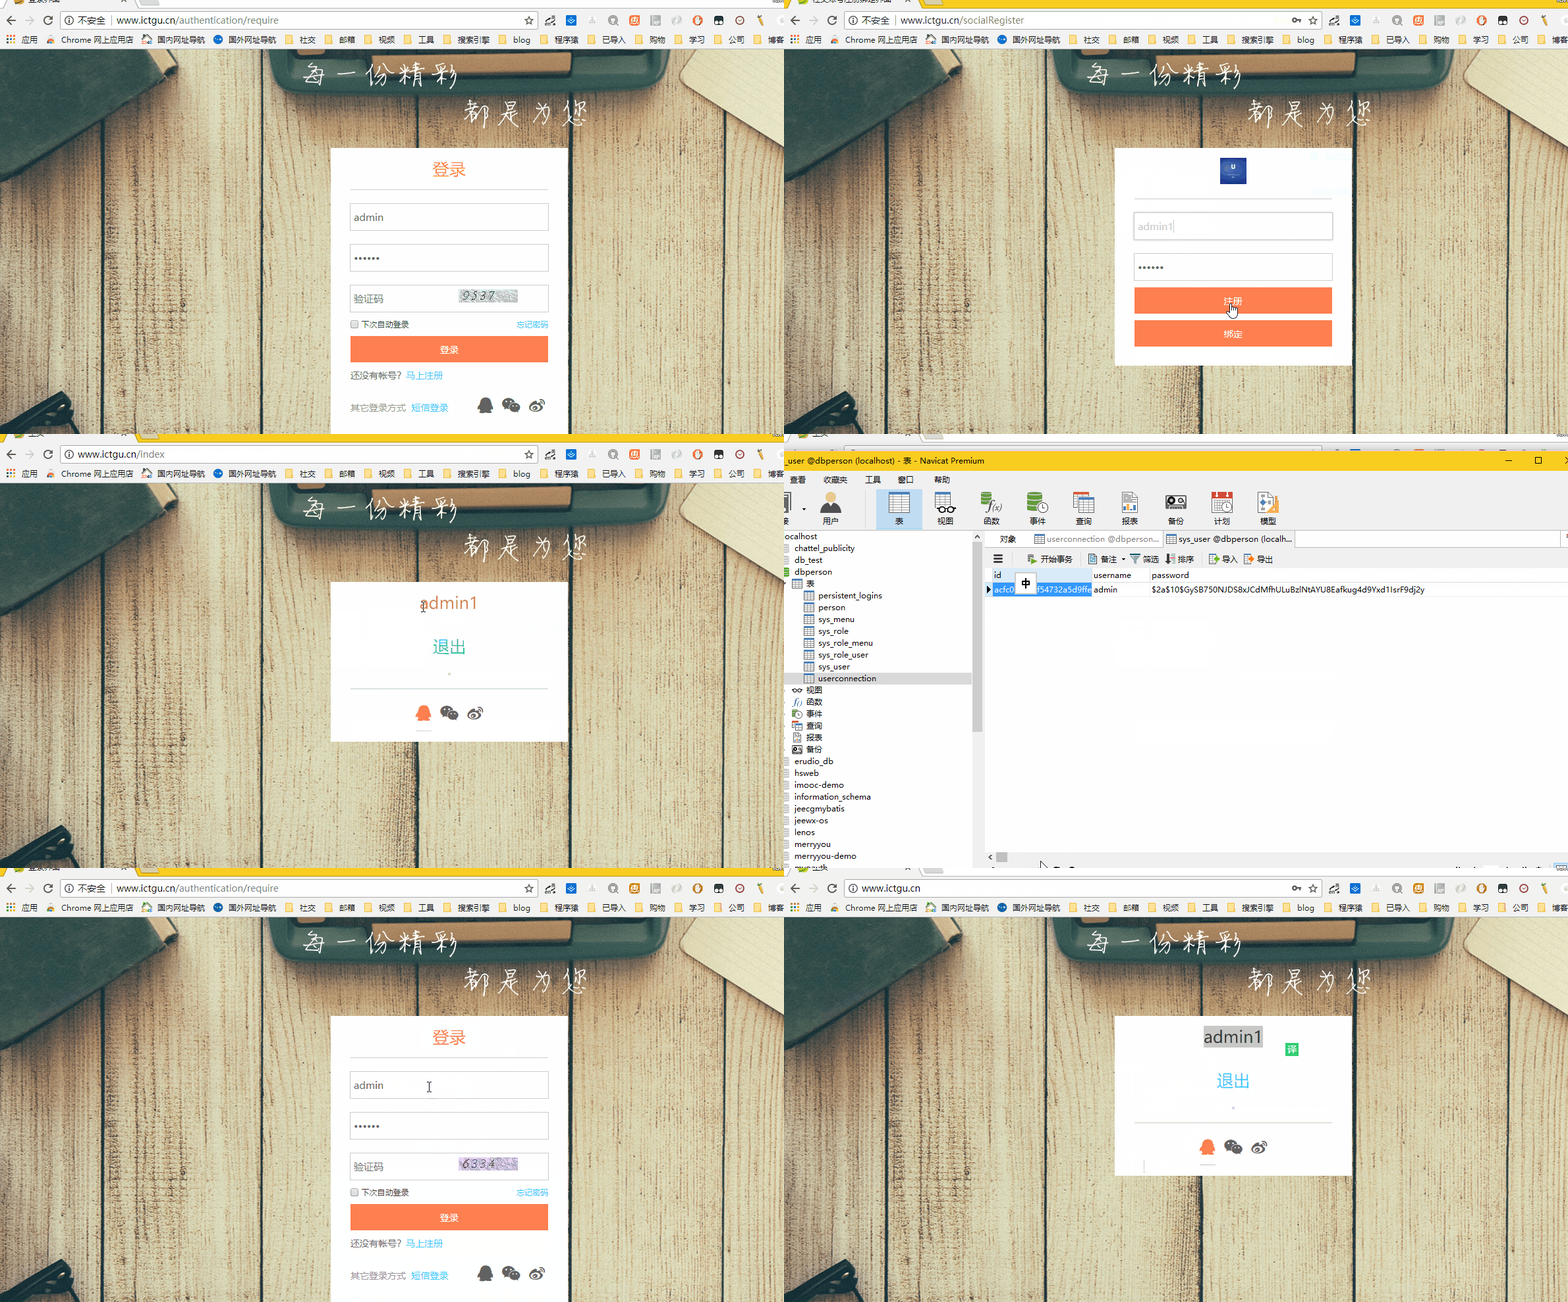
效果如下: 注册效果如下: 
绑定与解绑实现
要实现绑定与解绑,首先我们需要知道社交账号的绑定状态,绑定就是重新走一下OAuth2流程,关联当前登录用户,解绑就是删除UserConnection表数据。Spring Social默认在ConnectController类上已经帮我们实现了以上的需求。
获取状态
/connect获取状态。
@RequestMapping(method=RequestMethod.GET)public String connectionStatus(NativeWebRequest request, Model model) {setNoCache(request);processFlash(request, model);Map<String, List<Connection<?>>> connections = connectionRepository.findAllConnections();//根据userId查询UserConnection表model.addAttribute("providerIds", connectionFactoryLocator.registeredProviderIds());//系统中已经注册的服务提供商 model.addAttribute("connectionMap", connections);return connectView();//返回connectView()}protected String connectView() {return getViewPath() + "status";//connect/status }
由以上可得,实现connect/status视图即可获得社交账号的绑定状态。
实现connect/status
@Component("connect/status")
public class SocialConnectionStatusView extends AbstractView {@Autowiredprivate ObjectMapper objectMapper;@Overrideprotected void renderMergedOutputModel(Map<String, Object> model, HttpServletRequest request, HttpServletResponse response) throws Exception {Map<String, List<Connection<?>>> connections = (Map<String, List<Connection<?>>>) model.get("connectionMap");Map<String, Boolean> result = new HashMap<>();for (String key : connections.keySet()) {result.put(key, CollectionUtils.isNotEmpty(connections.get(key)));}response.setContentType("application/json;charset=UTF-8");response.getWriter().write(objectMapper.writeValueAsString(ResultUtil.success(result)));}
}
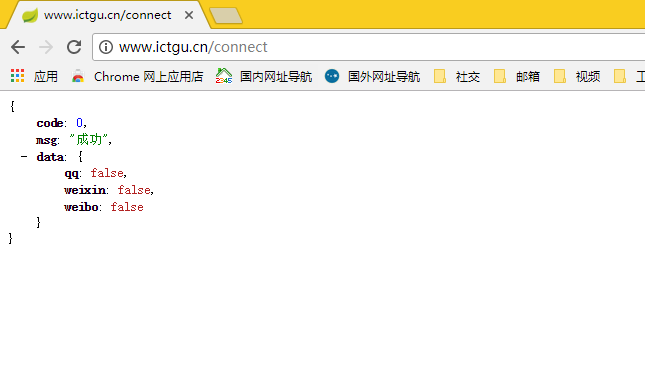
返回结果如下: 
绑定的实现
/connect/{providerId}绑定社交账号(POST请求)
跳转到授权的页面
@RequestMapping(value="/{providerId}", method=RequestMethod.POST)public RedirectView connect(@PathVariable String providerId, NativeWebRequest request) {ConnectionFactory<?> connectionFactory = connectionFactoryLocator.getConnectionFactory(providerId);MultiValueMap<String, String> parameters = new LinkedMultiValueMap<String, String>(); preConnect(connectionFactory, parameters, request);try {return new RedirectView(connectSupport.buildOAuthUrl(connectionFactory, request, parameters));} catch (Exception e) {sessionStrategy.setAttribute(request, PROVIDER_ERROR_ATTRIBUTE, e);return connectionStatusRedirect(providerId, request);}}
授权成功的回调地址
//将当前的登录账户与社交账号绑定(写入到UserConnection表)
@RequestMapping(value="/{providerId}", method=RequestMethod.GET, params="code")public RedirectView oauth2Callback(@PathVariable String providerId, NativeWebRequest request) {try {OAuth2ConnectionFactory<?> connectionFactory = (OAuth2ConnectionFactory<?>) connectionFactoryLocator.getConnectionFactory(providerId);Connection<?> connection = connectSupport.completeConnection(connectionFactory, request);addConnection(connection, connectionFactory, request);} catch (Exception e) {sessionStrategy.setAttribute(request, PROVIDER_ERROR_ATTRIBUTE, e);logger.warn("Exception while handling OAuth2 callback (" + e.getMessage() + "). Redirecting to " + providerId +" connection status page.");}return connectionStatusRedirect(providerId, request);}//返回/connext/qqed视图protected RedirectView connectionStatusRedirect(String providerId, NativeWebRequest request) {HttpServletRequest servletRequest = request.getNativeRequest(HttpServletRequest.class);String path = "/connect/" + providerId + getPathExtension(servletRequest);if (prependServletPath(servletRequest)) {path = servletRequest.getServletPath() + path;}return new RedirectView(path, true);}
实现 connect/qqConnected视图
    @Bean("connect/qqConnected")public View qqConnectedView() {return new SocialConnectView();}public class SocialConnectView extends AbstractView {@Overrideprotected void renderMergedOutputModel(Map<String, Object> model, HttpServletRequest request, HttpServletResponse response) throws Exception {String msg = "";response.setContentType("text/html;charset=UTF-8");if (model.get("connections") == null) {msg = "unBindingSuccess";
//            response.getWriter().write("<h3>解绑成功</h3>");} else {msg = "bindingSuccess";
//            response.getWriter().write("<h3>绑定成功</h3>");}response.sendRedirect("/message/" + msg);}
}
效果如下: 
解绑的实现
/connect/{providerId}绑定社交账号(DELETE请求)
//删除UserConnection表数据,返回connect/qqConnect视图
@RequestMapping(value="/{providerId}", method=RequestMethod.DELETE)public RedirectView removeConnections(@PathVariable String providerId, NativeWebRequest request) {ConnectionFactory<?> connectionFactory = connectionFactoryLocator.getConnectionFactory(providerId);preDisconnect(connectionFactory, request);connectionRepository.removeConnections(providerId);postDisconnect(connectionFactory, request);return connectionStatusRedirect(providerId, request);}
实现connect/qqConnect视图
/*** /connect/qq POST请求,绑定微信返回connect/qqConnected视图* /connect/qq DELETE请求,解绑返回connect/qqConnect视图* @return*/@Bean({"connect/qqConnect", "connect/qqConnected"})@ConditionalOnMissingBean(name = "qqConnectedView")public View qqConnectedView() {return new SocialConnectView();}
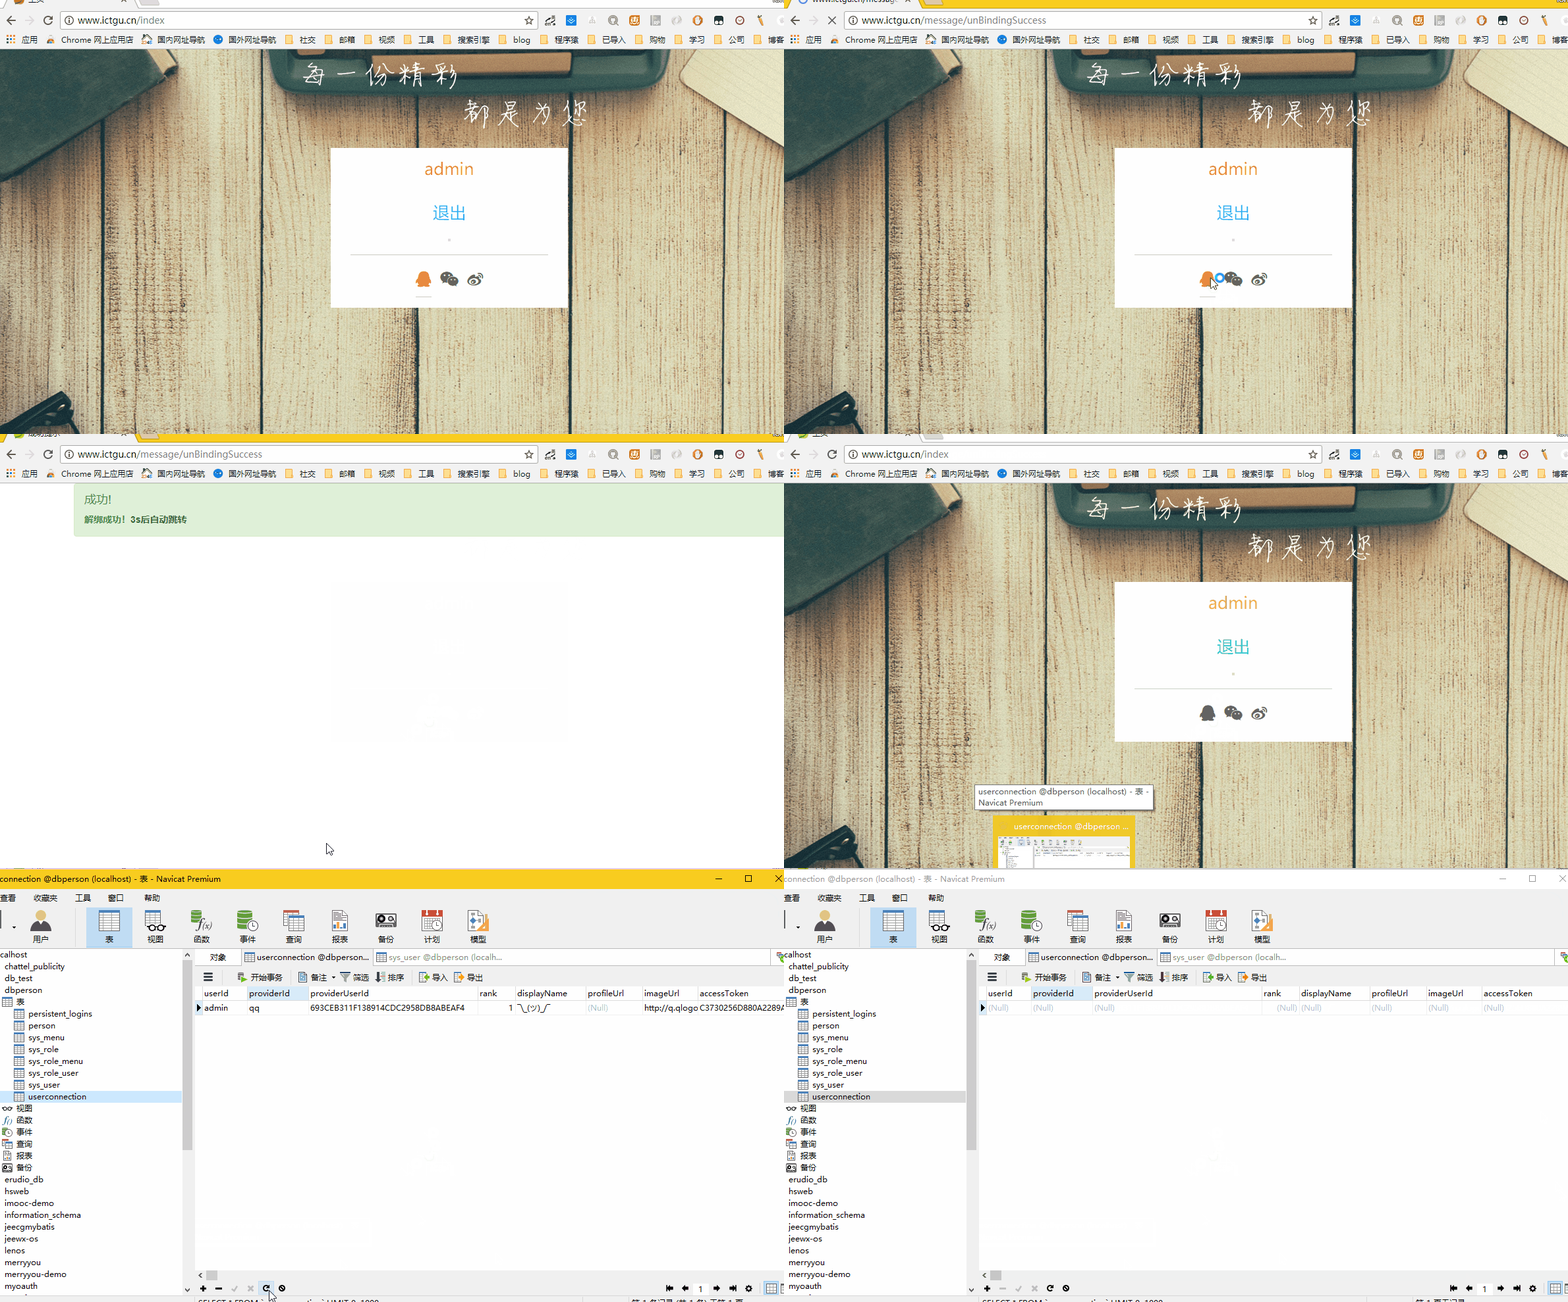
效果如下: 
代码下载
从我的 github 中下载,https://github.com/longfeizheng/logback


