今天对极光推送(Jpush )的使用方法做了个测试,首先在其官方网站上下载Android的jar包和demo,(也可以在注册并且输入包名的情况下下载demo,此时的demo就是一个已经配置好包名和APIKey的demo,可以直接将工程部署到手机上进行测试。)。
极光使用了两种不同的通知方式,一种是推送通知,一种是推送消息。
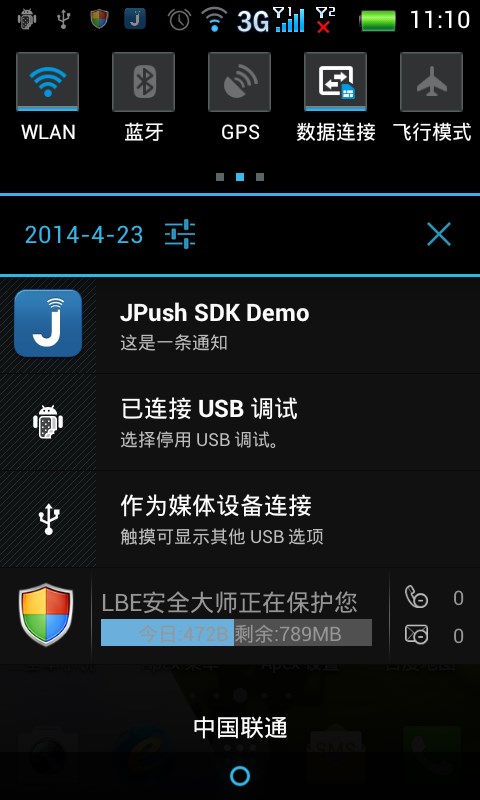
1.推送通知,此时发送的内容只是一条简单的文本消息。
点击消息后,会跳转到一个Activity(此Activity需要在清单文件中注册过滤器
<activity android:name="com.example.jpushdemo.TestActivity" >
<intent-filter>
<action android:name="jpush.testAction" />
<category android:name="jpush.testCategory" />
</intent-filter>
</activity>
)中,可以在此Activity中以获取传递Intent的方式获取到message的对象。并将其显示在Activity中。
tv_title = (TextView) findViewById(R.id.tv_title);
tv_content = (TextView) findViewById(R.id.content);
Intent intent = getIntent();
if (null != intent) {
Bundle bundle = getIntent().getExtras();
String title = bundle.getString(JPushInterface.EXTRA_NOTIFICATION_TITLE);
String content = bundle.getString(JPushInterface.EXTRA_ALERT);
tv_title.setText(title);
tv_content.setText(content);
}△ 一般来说如果不需要太多复杂内容的话,可以直接使用此种方式,将数据封装成一个Json,将其推送,客户端收到后将json解析出来并展现到前台即可。
此种方式有缺陷 ,极光中对推送通知中文本的大小有限制,为72个汉字(或144个其它类型字符)。传输信息有限。
2.推送消息,根据Demo可以看到,自定义消息接收需要客户端接收一个消息广播接收者。
<!-- User defined. For test only 用户自定义的广播接收器-->
<receiver
android:name="com.example.jpushdemo.MyReceiver"
android:enabled="true">
<intent-filter>
<action android:name="cn.jpush.android.intent.REGISTRATION" /> <!--Required 用户注册SDK的intent-->
<action android:name="cn.jpush.android.intent.UNREGISTRATION" />
<action android:name="cn.jpush.android.intent.MESSAGE_RECEIVED" /> <!--Required 用户接收SDK消息的intent-->
<action android:name="cn.jpush.android.intent.NOTIFICATION_RECEIVED" /> <!--Required 用户接收SDK通知栏信息的intent-->
<action android:name="cn.jpush.android.intent.NOTIFICATION_OPENED" /> <!--Required 用户打开自定义通知栏的intent-->
<action android:name="cn.jpush.android.intent.ACTION_RICHPUSH_CALLBACK" /> <!--Optional 用户接受Rich Push Javascript 回调函数的intent-->
<category android:name="org.linwoain.test" />
</intent-filter>
</receiver>在MyReceiver中有提示
/**
* 自定义接收器
* 如果不定义这个 Receiver,则:
* 1) 默认用户会打开主界面
* 2) 接收不到自定义消息
*/
public class MyReceiver extends BroadcastReceiver消息只能在此Receiver中获取,不会显示成通知,或者其他。在onReceive(Context context, Intent intent)中获取方式为
if (JPushInterface.ACTION_MESSAGE_RECEIVED.equals(intent.getAction())) {
Bundle bundle = intent.getExtras();
Log.d(TAG, "[MyReceiver] 接收到推送下来的自定义消息: " + bundle.getString(JPushInterface.EXTRA_MESSAGE));
Log.d(TAG, "[MyReceiver] 接收到推送下来的自定义消息: " + bundle.getString(JPushInterface.EXTRA_MESSAGE));
}
在此处也可获取推送通知中的内容
else if (JPushInterface.ACTION_NOTIFICATION_RECEIVED.equals(intent.getAction())) {
Log.d(TAG, "[MyReceiver] 接收到推送下来的通知");
int notifactionId = bundle.getInt(JPushInterface.EXTRA_NOTIFICATION_ID);
Log.d(TAG, "[MyReceiver] 接收到推送下来的通知的ID: " + notifactionId);
此种方式明显比推送通知的方式好一点的是其发送的信息容量比较大,为236个汉字。
除了在网页中控制台可以推送消息外,也可以在第三方平台上发出推送。
用Java代码的方式。https://github.com/jpush/jpush-api-java-client
是源代码公开的。可以直接下载jar包 https://github.com/jpush/jpush-api-java-client/releases
此jar包运行依赖于另外两个包
- gson
- slf4j
将此三个包加入到新建的java工程中。同时在main函数写入:
//这是在极光网站上申请的密钥
String masterSecret="*****7a513c1406ee45658f";
//应用的appKey,同样在网站上申请
String appKey="*****50726fb7d65b4c07eda";
//建立JpushClient类,用来发送消息的对象
JPushClient client=new JPushClient(masterSecret, appKey);
//创建自定义消息的参数
CustomMessageParams params = new CustomMessageParams();
//设置接收类型
params.setReceiverType(ReceiverTypeEnum.APP_KEY);
params.setReceiverValue("haha");
//可以发送通知
// MessageResult msgResult =client.sendNotificationAll("这里是测试发送的内容!+++1");
//也可以发送自定义消息
MessageResult msgResult=client.sendCustomMessage("这是一条测试的标题", "这里是内容部分123", params, null);如果无意外的话,即可发送一条消息到手机上。注意:自定义消息需要在客户端的Receiver中自行定义。不会发出提醒。
2014年5月4日14:28:23
附加内容,自定义通知栏的样式的两种方法:
1、发送自定义消息,自己定义Notification的样式并显示。
2、发送推送消息。需要用到Jpush包提供的API。
当用户需要定制默认的通知栏样式时,则可调用此方法。
极光 Push SDK 提供了 2 个用于定制通知栏样式的构建类:
- BasicPushNotificationBuilder
- Basic 用于定制 Android Notification 里的 defaults / flags / icon 等基础样式(行为)
- CustomPushNotificationBuilder
- 继承 Basic 进一步让开发者定制 Notification Layout来源: <http://docs.jpush.cn/pages/viewpage.action?pageId=557243>
- 继承 Basic 进一步让开发者定制 Notification Layout
一般使用BasicPushNotificationBuilder即可。
BasicPushNotificationBuilder builder = new BasicPushNotificationBuilder(
getApplicationContext());
builder.notificationDefaults = Notification.DEFAULT_LIGHTS; //只设置了默认闪光灯
builder.notificationFlags = Notification.FLAG_AUTO_CANCEL; // 设置为自动消失
builder.notificationFlags = Notification.FLAG_AUTO_CANCEL; // 设置为自动消失
JPushInterface.setPushNotificationBuilder(1, builder); //设置Jpush的通知栏样式为build,并设置样式编号为1,发送推送时需使用此编号,此方法需在Jpush初始化后使用
因为在业务中需要自定义声音又要求使用推送方式。所以设置一个通知栏样式中声音不设置。在收到推送的事件(Receiver)中播放一段声音。使用SoundPool方式,在应用初始化时初始化一个SoundPoll对象和一个int值
public static SoundPool sound;
public static int soundId;初始化对象
sound = new SoundPool(3, AudioManager.STREAM_MUSIC, 0);
soundId = sound.load(getApplicationContext(), R.raw.lingsheng, 1);在Receiver中播放
if (JPushInterface.ACTION_NOTIFICATION_RECEIVED.equals(intent
.getAction())) {
sound.play(MyApp.soundId, 1.0f, 1.0f, 1, 0, 1.0f);//利用初始化后的SoundPool对象播放
}来自为知笔记(Wiz)


